Cutting back on your energy usage is one of the best ways to bring down your electricity bill. Making changes to not only your wattage consumption, but also the way your home retains and expels air can have a dramatic effect on the way your space uses electricity. Here are 5 tips on how to lower your electricity bill.
Tip 1 – Focus on Small Steps
Start looking at how many rooms are being lit up at night and what appliances are running. Swap out your energy hungry incandescent bulbs for green picks such as LEDs. Many people are also unaware of how many phantom loads are being run throughout their homes, these loads can account for up to 15% of a house’s energy bill.
A vast majority of your appliances are designed to run 24/7, and you may not realize this but they are using more energy than you think. An easy fix for this is to get a power strip and centralize where all your appliances draw their power, and when you want to, you can easily shut things off when you’re not using them. Experts say that 15-40% of energy consumption is behavior based, so think about what you can control right now.
Tip 2 – Get an Energy Audit
Air leaks account for 25-30% of an average energy bill, and this is one of the most profound steps that you can take for the betterment of your homes’ comfort and reducing the amount of your energy bill. Energy auditors are well equipped with the right tools and knowledge to quickly pinpoint problem areas in your home.
They will first do a “Blower Door” test, which will determine the overall leakiness of your home, as well as pinpoint specific leaks.
Then they will take an infrared camera and survey your spaces and detect air leakage within building envelopes, this is generally done on cold days, where the camera will reveal exactly where the problem is.
The third and final thing they will do is called a “Duct Blast”, which will tell you where your ducts air is leaking. Leaky ducts require your systems to work harder to regulate and provide the hot and cool air expelled throughout the home.
Tip 3 – Don’t Be Afraid of Over-Insulation
A common fear for those looking to upgrade their home is that if they tighten up too much, they will find themselves in an unhealthy or dangerous living situation. On average, a new home will have a Natural Air Change Rate (NACR) of 2 hours; this is the amount of time it takes indoor air to clear out in place of fresh air from outside. Strict building codes require that any structure with NACR of three hours or more must be ventilated mechanically, so unless you’ve sealed your home up like a vacuum you should be fine.
The real problem lies with new homes with leaky ductwork. This can give way to negative pressure in your home, which causes too much air being sucked into your home, in turn causing it to turn into carbon monoxide. Most heating appliances will produce by-products of mainly water and carbon dioxide, but if the combustion from these processes doesn’t get enough oxygen, carbon monoxide is formed.
Tip 4 – Prioritize Sealing Your Home
Sometimes it’s not within the budget to do a complete upgrade that could cost nearly $10,000. These three steps alone could give you 30% in energy reduction and in turn will cost you just $1000.
Reducing the intake and outtake will give you the biggest bang for your buck when it comes to cash savings and comfort in your home. If you can’t invest in a contractor, there are plenty of references out there that will help you with exactly what you need.
Clean out the entire space, and wipe away all existing insulation so that you can see the construction. If you’re able to see what’s going on overhead, you’ll be able spot points of leakage, such as gaps, lighting fixtures vents and more. Your new insulation should be at least one foot thick.
Clean out your basement and crawl spaces and seek out all cracks, gaps and leaks and pack as much insulation as you can in these spaces. Pipe insulate is another great way to reduce your energy costs.
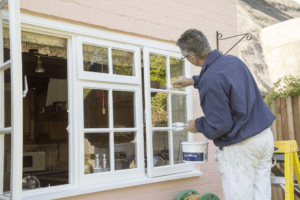
Tip 5 – Invest in New Windows
If you live in an area that experiences the four seasons at full-blast, you may notice that during these seasons there are areas of your house you just don’t want to be. Its no surprise that a lot of discomfort can result from poorly insulated windows. If and when you decide that changing your windows is the right choice for you, there are four types of windows that you should reference: Single pane windows, Double pane windows, Low-E windows and super windows. In practice each window is given an R rating signifying their level of insulation. As a reference, wall insulation will carry a rating between R12-R20.
Single Pane: common in older homes, and feature a single glaze. They are a poor choice if you live in an area with notable changes in temperature; these windows carry an R1 rating.
Double Pane: have two panes or glazes and carry an R2 rating.
Low-E Windows: popular choice for those worried about energy consumption in heating and cooling. These windows will register an R3 rating.
Super Windows: are the newest generation of windows that feature multiple layers of film between each glaze or pane. They come in ratings between R7-R11. Marvin Windows now makes their own super window, with a triple pane, which ups the thermal performance significantly, reaching an unparalleled level of insulation that will knock hundreds of dollars off your energy bill.
All of these upgrades have the power to change the way a space is experienced phenomenally, and not only will you be able to recover dead areas of your home, but you may also find yourself in several new cozy spots.
Source: inhabitat